
PayNuts POS - Table Mapping
Step 1
From the MENU screen, tap the three dots on the upper right corner.
Step 2
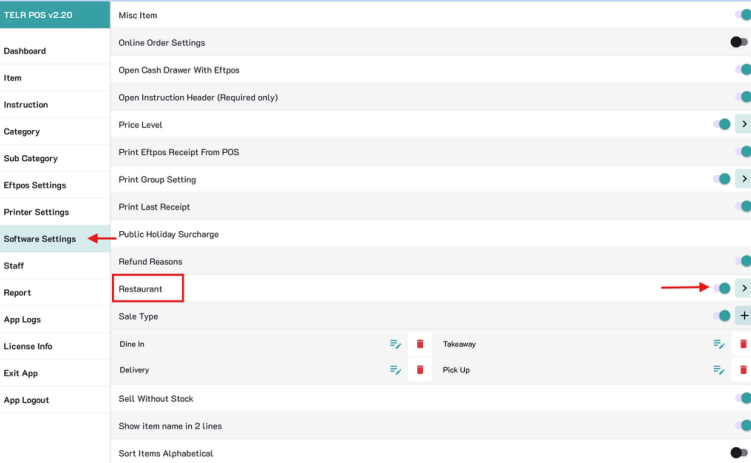
- Tap Settings
- Tap Software Settings.
Scroll down to Restaurant and toggle it ON then tap the arrow right next to the toggle button. If you want to disable table mapping, simply toggle it OFF.
Step 3
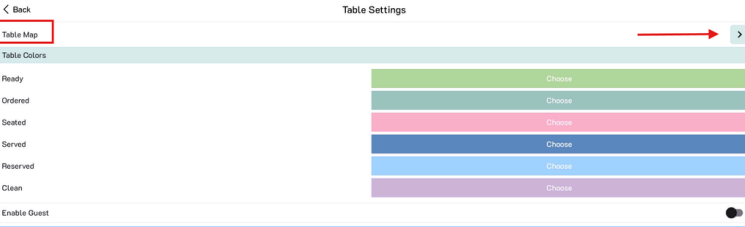
- Tap Table Map.
Table colors shows the status of each table such as if its ready (available) or ordered (taken). To change the table colour, click on Choose and select from the colour palette.
Step 4
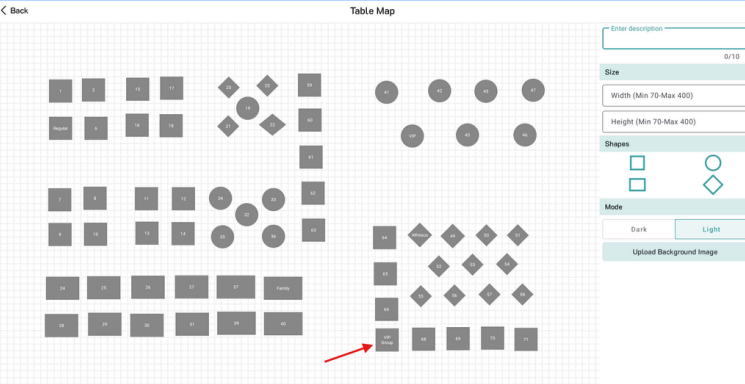
On the Table map, select a Table and enter the name such as VIP, then set table sizes, shapes and hit SAVE.
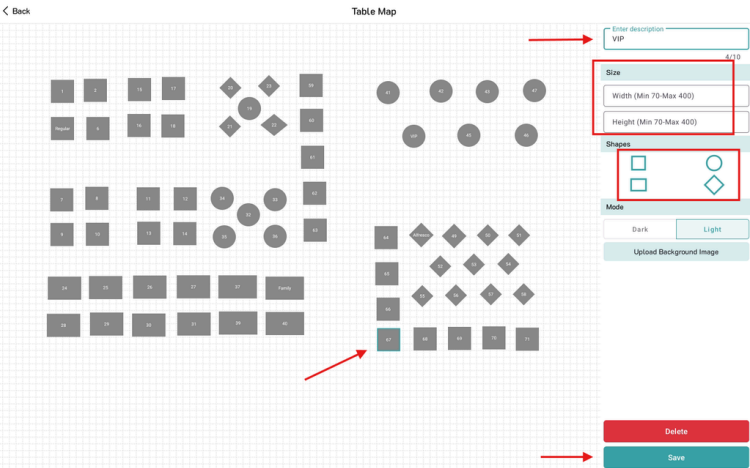
Once saved, the name will show on the table map.
Step 5
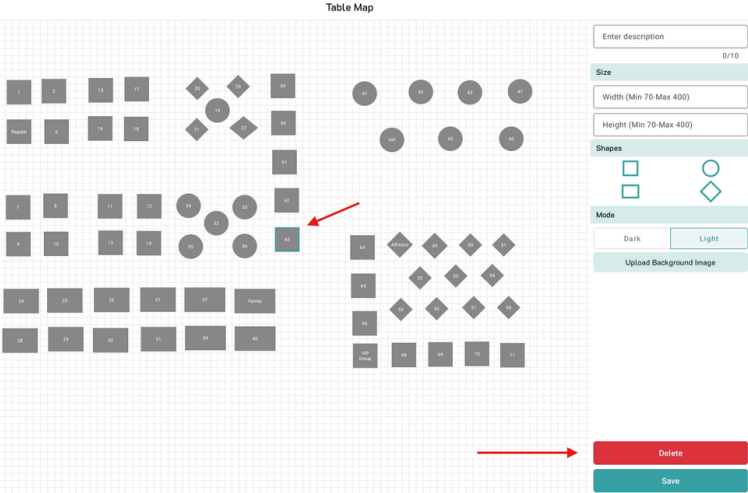
To delete a table, select the table and tap on Delete then tap Save.
Step 6
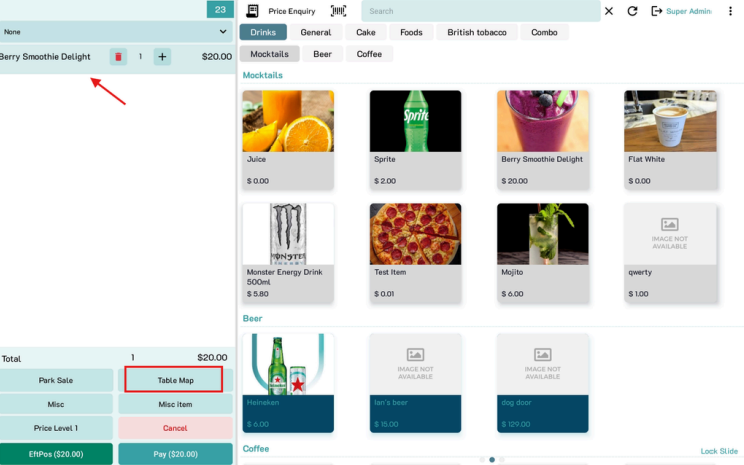
Once the customer orders, take the order, then tap Table Map.
Step 7
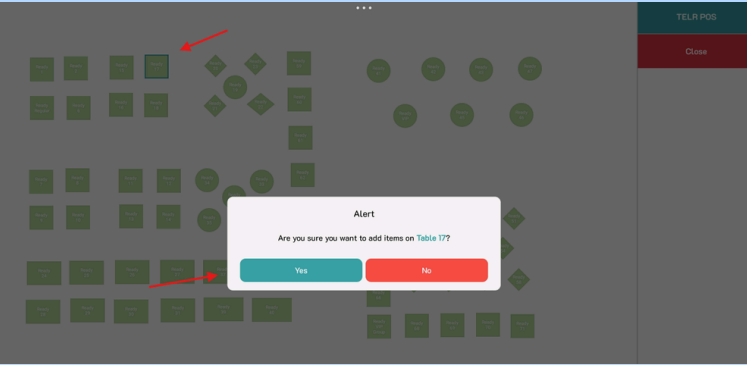
Select the table the customer will be staying and hit YES. You may go back to sale screen again to take other orders.
Step 8
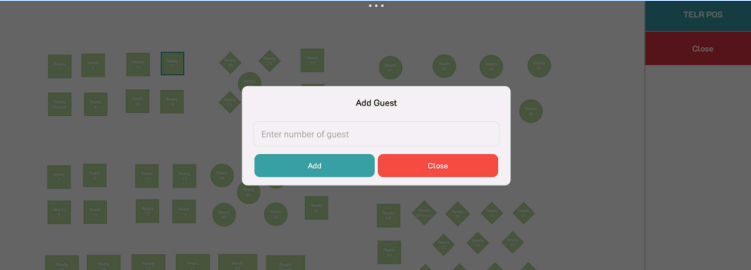
If Enable guest is turned on, another message will prompt on the screen asking on how many guest will be seated.
Step 9
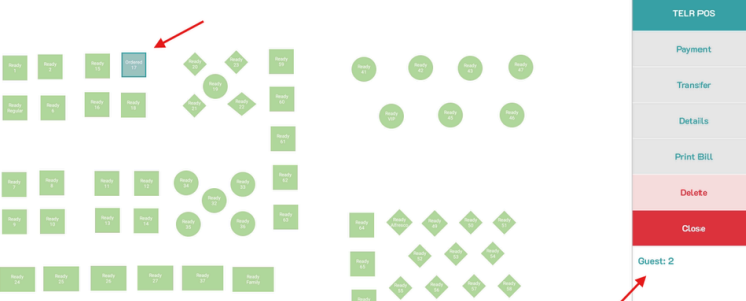
Enter the number of guest and select the table they will be seated.
Step 10
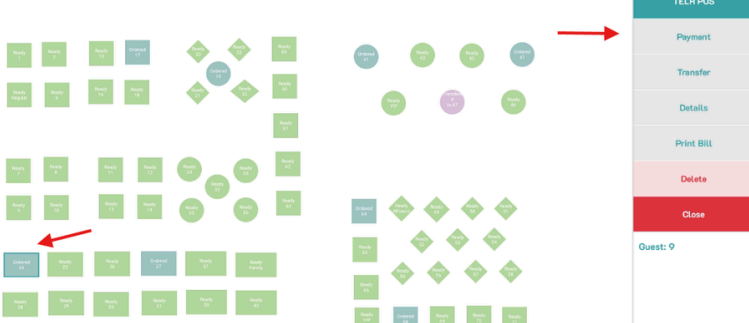
Go back to table map again from sale screen, if the customer is ready to pay. For Payment, select the table again, and hit payment
Step 11
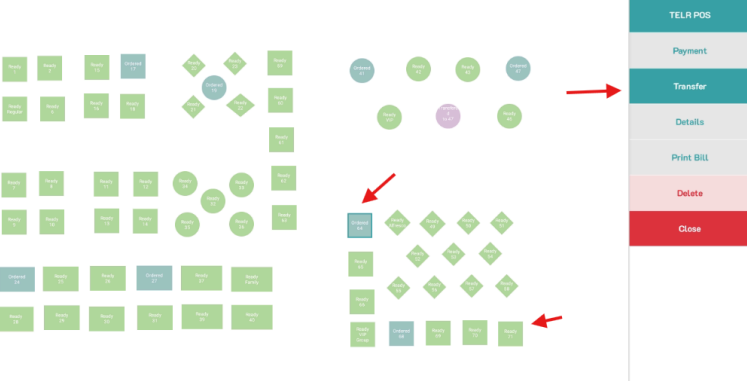
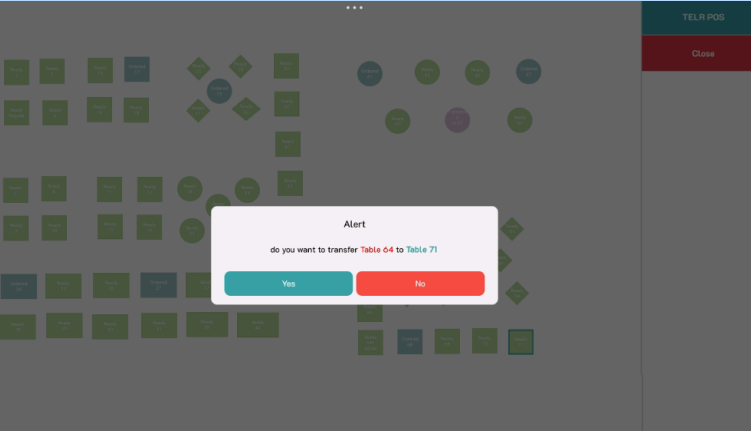
For table transfer, select the table and click on the preferred table they like to transfer.
Step 12
Click on YES.
Step 13
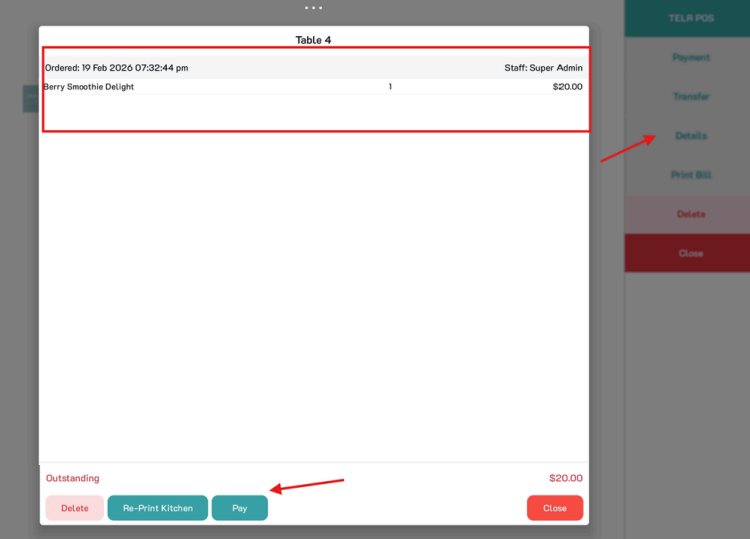
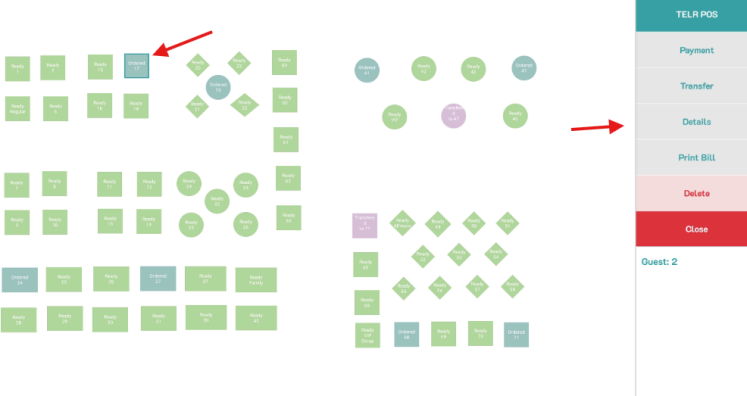
To show the table details, click on the table number and hit details
Step 14
- The order will show for that specific table.
- Proceed with the payment if necessary or hit close to exit again